Our bathroom vanity is only 30" wide so we have always had to get a little creative with our storage situation. Up until recently, we had been utilizing a tall bathroom cabinet to house many of our daily toiletries. Over the years, that cabinet began to slowly fall apart. First, the bottom drawer front fell off so I just put a tall basket in its place. More recently, all of the drawer fronts had completely fallen off, the sliding drawer hardware had snapped, and the cabinet wasn't even hanging on by a thread. It was time to snip that thread, cut our losses, and look for an alternative solution.
(You can see my previous post on our bathroom organization here.)
The bathroom itself hasn't been updated in about 15 years now and is something we would like to tackle within the next year or two. Once we were sans cabinet, I needed something ASAP to keep our limited counter space free of my clutter and to make up for the loss of three drawers and three shelves. You know where I am going with this right? I really didn't want to invest a lot of money into something knowing that we aren't too far away from making more permanent changes to the bathroom.
With that in mind, I went straight to Facebook Marketplace to look for an inexpensive solution. I was looking for a piece of furniture that wasn't too deep (I didn't want it to be obtrusive in our modest-sized bathroom) and something with doors. With the germs that fly in the bathroom, I always prefer storage behind drawers and doors. Doors also cut down on the amount of surface that I have to clean and wipe down frequently. I initially thought a lawyer style bookcase would be a bit different, but with our bathroom being on the smaller side, I ultimately decided it would be nice to do something with more glass. So I started to search for curio style cabinets that were less than 14" deep.
I figured that it would be a quick find, but it took some weeks of checking in and trying a variety of search terms. I finally stumbled upon something within my low budget, but it would require some modifying to make it juuuuuuust right.
The picture above is from the original listing, and my husband raised his eyebrows when I told him I wanted to take a drive to pick up this piece of furniture for our bathroom. Although the wood wasn't in great shape, the price was low and I saw a diamond in the rough.
What I was instantly drawn to was the top half of the cabinet. The glass portion was the perfect size and I also appreciated the decorative moulding for a more traditional look. The bottom of the cabinet wasn't at all my style and felt too bulky, but my hope was that we could construct something a bit more streamlined. As soon as we got the cabinet back into our home, we began to slowly deconstruct it to separate the top piece from the bottom.
We built the new base from hardwood 1" x 2" poplar boards.
Our Kreg Jig was our best friend for this project, as it allowed us to create a series of concealed pocket holes to assemble a clean looking finished product.
The base of the cabinet was going to be about 12" deep by 24" wide. We did two tiers of support so we would be able to add a shelf at the bottom as well. The legs were constructed of 2" x 2" boards.
We screwed the 1" x 2" side pieces into the 2" x 2" legs (twice). Then we attached the back and front 1" x 2" pieces.
Almost there!
We cut a 1/2" piece of birch plywood to create the bottom shelf.
I always freak out a little during the middle. I was worried the clean and simple bottom wasn't going to tie into the more traditional top. But before I made any final judgment, I decided to prime and paint the entire piece a solid color.
Prior to painting, I did a few things to prep the cabinet. We used our brad nailer to affix the shelf to the base. Then I caulked all of the cracks around the legs. I used a sanding block to sand everything down. After that, I took a liquid deglosser to the top half of the cabinet because the wood had a chipping top coat and I wanted to be sure I wasn't going to have any trouble with paint adhering. Not done yet, I used some wood filler to fix any cracks, dents, holes, scratches, etc... Finally, I taped all of the glass off with painter's tape and found my oil-based primer.
Once the primer was dry, I sanded everything again and did two coats of Benjamin Moore's Westcott Navy.
Once painted, the cabinet turned out really lovely. The entire project came in under $75 for the cabinet, wood supplies, and paint. Considering I had been pricing out new options for between $250 - $1200, I am very happy with how this turned out.
I use the cabinet to hold everything I reach for on a daily basis. The top shelf holds a divided basket with face cloths, washcloths, and an extra roll of toilet paper.
An acrylic tray corrals all of my lotions and facial creams.
While a small handled basket works great to hide my makeup clutter. I also use a basic drinking glass to hold some facial cotton pads and a clear apothecary jar for cotton swabs.
The bottom shelf holds a couple extra clean towels, bath salts, and a spa brush.
Because we added a small shelf below, I was able to fit two tall baskets to conceal the less sightly toiletry clutter such as small grooming tools and a manicure kit.
Let's take a look at a side-by-side before and after to show what a little out of the box thinking can yield.
The original base was salvageable enough to donate so hopefully someone else can put that piece to good use also.
Don't you love a good "one man's trash is another man's treasure" story? The overall depth of the cabinet is only 12" so I was able to add quite a bit of storage with a tiny footprint. And it's so pretty I hope it sticks around even after we get to updating our bathroom someday.
I would love to see/hear about your Facebook Marketplace finds too! Or how you are getting creative with storage around your home! Share the details in the comments below or tag me on Instagram!
P.S. I purchased this cabinet on Facebook Marketplace weeks prior to any news of COVID-19. I completely understand the sensitivity of the current situation and Facebook Marketplace may not be the best way to shop given current social distancing recommendations. I still wanted to share in case you have a piece of furniture that might need some new life, or if you are just looking for inexpensive and space-saving bathroom storage solutions. Please stay safe and healthy my friends. ♥
Showing posts with label Budget Friendly. Show all posts
Showing posts with label Budget Friendly. Show all posts
Saturday, March 14, 2020
Monday, November 11, 2019
4 DIY Wood Peg Rail Organizer
The rail of hooks that we recently added to our laundry room was one of our easiest DIYs yet. And at the same time, it is one of my most favorite! I absolutely love how charming it is and I sort of want to make a few more varieties for our bathrooms and garage.
These wooden peg rails are popping up all over in stores at a variety of prices. Some less expensive than others, but none as inexpensive as the one we were able to make ourselves. Plus, isn't it always the greatest when you can customize it to fit your space in size and color? Yes and yes.
These wooden peg rails are popping up all over in stores at a variety of prices. Some less expensive than others, but none as inexpensive as the one we were able to make ourselves. Plus, isn't it always the greatest when you can customize it to fit your space in size and color? Yes and yes.
Wednesday, August 7, 2019
44 Before & After: An Organized Nightstand Drawer
We all have that one drawer. The one that becomes a dumping ground with an endless pit of random items. It happens to the best of us!
Most of the drawers around our home are set up in a way that they self maintain, but there are a couple that demand attention more often; our junk drawer in our kitchen, and apparently, my nightstand drawer both top that list.
I clean out the junk drawer every month or so, because even with dividers, random items that don't have an instant home, end up in that very popular drawer. Being in such a high traffic area that we all utilize, I am pretty good about tackling it frequently to keep some semblance of order.
Friday, January 25, 2019
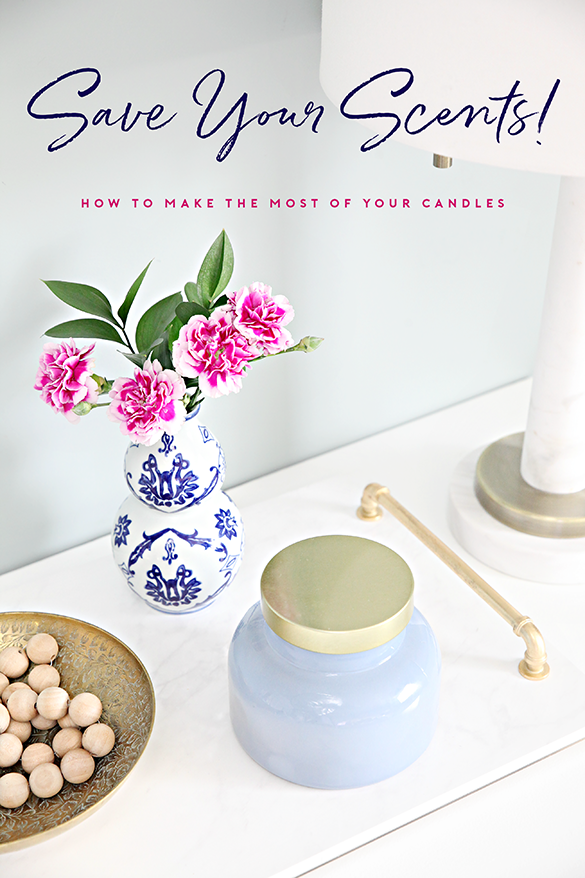
48 Save Your Scents: How to Make the Most of Your Candles (and use them as storage!)
Candles are one of my favorite ways to add ambiance and warmth to our home. I really appreciate how they can change the entire mood of a space just through scent. What I don't love is wasting my candles, whether it be the wax or the actual vessel that it comes in.
Over the years I have learned to look for candles that are not only delightful in scent, but also come in a pretty jar. The jars they come in can always be upcycled and used as vases or storage around the home. More on that in a minute...
Over the years I have learned to look for candles that are not only delightful in scent, but also come in a pretty jar. The jars they come in can always be upcycled and used as vases or storage around the home. More on that in a minute...
Wednesday, March 14, 2018
83 Do it Yourself! Quick and Easy Customizable Drawer Dividers
You all know I have chatted about some of my online struggles as of late, and one of those frustrations is that it has just been too long since I have had a true lightbulb moment. I have been craving a stroke of creativity that pushes me to come up with a solution I haven't seen done 1,001 times before. And it finally happened! I thought of a new use for a common product and it really helped me with organizing our son's new closet drawers. So, if you have already seen this little idea of mine somewhere else, can you do me a favor and not tell me? #bestfriendpact
To say these little things really excite me is an understatement. I selected a new unit for our son's closet that offered up five large drawers of storage, but those large drawers needed a little division to prevent them from becoming full-on jumbled messes down the road. This super quick and easy project was born out of a need that wasn't being met by retailers, and also by giving myself a few days to let my ideas swirl.
You can see the most recent photos of the closet in this post here; the interior measurements of the drawers come in at 25 1/2" x 21". That is a LOT of drawer area! And I really didn't realize it until I put some of his clothes inside and started looking for interior organizers and dividers. So much new space to play with!
I considered quite a few options, and the ultimate goal was to add front-to-back dividers to all of the drawers to categorize the articles of clothing by type.
We have DIY'd quite a few drawer organizers over the years (I will link those projects below), but none of our previous methods were standing out as great options here. Although it seems simple enough to add a divider down the center of a drawer, there are a lot of ways to achieve this, but most are permanent. Especially if you are looking for something that is a bit sturdier. My objective was to do something easy, not construction heavy, and not permanent to the drawer. He is a growing boy and how the drawers are used is sure to evolve over the years.
I have seen expandable dividers on the market, and they were my "go to" for this project. But the more I searched, the more I realized that they are generally A) costly and B) don't fit the full depth of these larger drawers. I also needed 6-7 dividers, and when I started adding all of those up, it seemed a bit silly to spend $50+ on something to hold shirts in place.
And that is when I came up with the idea to use cord clips! I have used them to hold toothbrushes, pens and of course, cords, so why not a slim piece of wood? It just might work!
The best part is that the adhesive on the rubber cord clips can be removed from any surface (sometimes with a little help from rubbing alcohol or heat), or the clip can be used with a Command Strip as well. No commitment required.
So I did a little online searching and shopping and found a pack of twelve for $7 with free shipping. I quickly placed my order and went to Home Depot to search for thin wood options. (Note: There are plenty of more expensive options in terms of the rubber cord clips, but for this type of project, these worked great for us and I didn't notice a difference in quality when compared to others I have used in the past.)
Could you use foam core? Probably! But I really wanted something sturdy. I have used foam core in the past, and while it is a cheap and great option, it doesn't always stand the test of time. And with a careless kiddo, I ruled that out quickly.
I found a few inexpensive wood types to select from but ultimately decided the biggest bang for my buck was to purchase a couple of these boards and cut them down to size. That way I could take advantage of both the height and width I wanted and get two full dividers from a single piece of craft wood. (You may also have luck finding easy-to-cut options at craft stores.)
We cut the boards to just shy of the drawer height and width and sanded down the edges to a smooth finish.
Quick Tip: You can also have the wood cut for you at Home Depot (you may just want to be prepared to still do a light sanding on the edges).
Then measured inside the drawer and used a pencil to mark the location of the dividers.
Using a straight edge, we drew a light line on the inside of the drawer that could later be erased/washed off. This gave us a visual of where to place the cord clips.
Once the cord clips are in place, it is as simple as inserting the wood pieces.
Quick Tip: We cut the wood about a half an inch shorter than the drawer, so it was still a tight fit. I found it easiest to place a finger under each clip when installing the wood pieces to prevent the clips from sliding down/slipping.
Once I had all of that figured out, I decided to wrap the boards with some white vinyl. They could also be stained or painted, this was just the cleanest, quickest solution at the time.
I couldn't fold and put away his clothes fast enough!
We still have some final closet details to wrap up and then I will share all of the organization and do a quick folding tutorial for the shirts. I would rather file clothes than paperwork any day!
OK, so that was a lot of words for the quickest customizable drawer divider project ever! To summarize:
Measure, cut the wood to length, mark the drawer, stick the cord grips, add the wood divider. DONE!
There are no limits to how many you can add, or the number of ways you can divide the drawer to fit your needs. This is especially helpful for those deeper drawers, like dressers and pantries, in which there may not be a lot of off-the-shelf options on the market. And the wood slats can also be customized to compliment the drawer and contents with paper, paint, stain, etc.... So many wins! Definitely my favorite DIY divider solution to date.
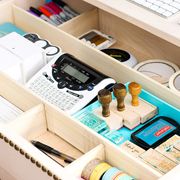
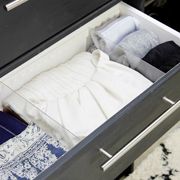
Speaking of DIY drawer dividers, as promised, below you can find a variety of alternative solutions that may better fit your project needs:
 |
 |
 |
 |
 |
 |
Friday, November 24, 2017
27 Organize With This: Magazine Files!
Happy Thanksgiving everyone! I hope your bellies are full and you're snuggled in with your favorite people. Did you take the day to fight Black Friday crowds or surf from your sofa?
Or are you up for some organizing? Maybe not today, but some last minute end-of-year sprucing before Christmas entertaining begins?
When I search for storage, I always try to consider how it can be re-used down the road as our needs change and our family evolves. I aim to select things that will stand the test of time and continue to be used and purposeful for many years to come. One of my "go-to" organizers is the not too expensive but always dependable magazine file, and I am guessing many of you have these hanging out in your homes also! Yes, they are perfect for managing that stack of glossy paged goodness, but they really can be utilized in infinite ways.
Below find 15 quick and easy ways to organize all around your home using basic magazine holders, and at the end, I share the easiest crafty hack for adding even more functionality to an already awesome organizer.
One thing to note is that these holders come in a variety of materials, typically metal, plastic and cardboard, and some of these suggestions work best with more durable or easy-to-clean finishes.
O N E // In the kitchen use them for disposables/paper products; include a small stack of plates, cups, napkins, and silverware for those last minute no-fuss meals.
T W O // Magazine files prevent water bottles from tipping and rolling around inside of cupboards or drawers.
T H R E E // Put together a small meal planning kit and include favorite recipes, food magazines, shopping lists, coupons, and a pen, and tuck it all away neatly inside of the pantry.
F O U R // Food packaging and wraps; magazine files help to keep them vertical so no stacking or rummaging is required.
F I V E // How about potholders and oven mitts?
S I X // Baking items; cookie cutters, sprinkles, whisks & spatulas and a hand mixer.
S E V E N // You know I am obsessed with using these bins in our fridge and freezer, but magazine files could definitely take on similar functions. Like lunch making caddies! Fill these handy helpers with all of your favorite lunch items and sides for on-the-spot meal making.
E I G H T // Also in the fridge, these can be used to hold fruits, veggies, breakfast items, yogurt, condiments, juices, etc...
N I N E // In the linen closet, magazine files can help to hold rolled sets of sheets (much easier than trying to fold them perfectly) and towels. They can also be labeled by person or room.
T E N // In the laundry room they can be used to hold stain remover, a lint roller, fabric shaver, starch, etc...
E L E V E N // In the bathroom, use one to hold hair tools (just be sure it is heat resistant or wait to add items until after they have cooled down).
T W E L V E // Hair products and toiletries; magazine files keep them organized under the bathroom sink.
T H I R T E E N // Cleaning products and rags, but again, be sure to select holders made out of an easy-to-clean material.
F O U R T E E N // Organize and corral paperwork to file and bills to pay. Most file folders are designs to fit nicely, especially these vertical types.
F I F T E E N // Turn one into a valet/charging station to hold daily items such as keys, change, wallet and phone.
Here is how to make that last one happen....
First, for cord management, I drilled a hole into the back of the box with a wide drill bit. You could also use a utility knife to cut through some types of material. I decided to add a decorative grommet to clean up the edges and prevent any future tearing.
To add "shelves" I went to the lumber department at Home Depot and picked up some cheapy hobby boards. (I believe I used these for the rails and these for the shelves.)
These lightweight boards are easy to cut to length with no need for power tools. For the rails, I simply used a ruler to draw a level pencil line inside the walls of the magazine file and affixed them with hot glue.
I debated about staining the project boards, but took the easy route and just wrapped them in adhesive shelf liner (this one for reference, which has unfortunately more than doubled in price since I purchased it earlier this year).
I love how this little hack really changes the overall functionality of the magazine file and becomes the perfect place for dropping daily necessities.
So tell me, do you already use magazine files for any of these functions, or do you have any additional ways to put them to work? Let's keep growing the list in the comments below!

U P D A T E ! I can't believe I left this one out, as it was the one that ignited the idea for the entire post.
How about putting a few magazine files inside of a bigger basket to act as dividers? It worked so well for our gift wrap items such as boxes, tissue, gift bags, ribbon, tags and bows! Perfect for this giving season!
Or are you up for some organizing? Maybe not today, but some last minute end-of-year sprucing before Christmas entertaining begins?
When I search for storage, I always try to consider how it can be re-used down the road as our needs change and our family evolves. I aim to select things that will stand the test of time and continue to be used and purposeful for many years to come. One of my "go-to" organizers is the not too expensive but always dependable magazine file, and I am guessing many of you have these hanging out in your homes also! Yes, they are perfect for managing that stack of glossy paged goodness, but they really can be utilized in infinite ways.
Below find 15 quick and easy ways to organize all around your home using basic magazine holders, and at the end, I share the easiest crafty hack for adding even more functionality to an already awesome organizer.
One thing to note is that these holders come in a variety of materials, typically metal, plastic and cardboard, and some of these suggestions work best with more durable or easy-to-clean finishes.
O N E // In the kitchen use them for disposables/paper products; include a small stack of plates, cups, napkins, and silverware for those last minute no-fuss meals.
T W O // Magazine files prevent water bottles from tipping and rolling around inside of cupboards or drawers.
T H R E E // Put together a small meal planning kit and include favorite recipes, food magazines, shopping lists, coupons, and a pen, and tuck it all away neatly inside of the pantry.
F O U R // Food packaging and wraps; magazine files help to keep them vertical so no stacking or rummaging is required.
F I V E // How about potholders and oven mitts?
S I X // Baking items; cookie cutters, sprinkles, whisks & spatulas and a hand mixer.
S E V E N // You know I am obsessed with using these bins in our fridge and freezer, but magazine files could definitely take on similar functions. Like lunch making caddies! Fill these handy helpers with all of your favorite lunch items and sides for on-the-spot meal making.
E I G H T // Also in the fridge, these can be used to hold fruits, veggies, breakfast items, yogurt, condiments, juices, etc...
N I N E // In the linen closet, magazine files can help to hold rolled sets of sheets (much easier than trying to fold them perfectly) and towels. They can also be labeled by person or room.
T E N // In the laundry room they can be used to hold stain remover, a lint roller, fabric shaver, starch, etc...
E L E V E N // In the bathroom, use one to hold hair tools (just be sure it is heat resistant or wait to add items until after they have cooled down).
T W E L V E // Hair products and toiletries; magazine files keep them organized under the bathroom sink.
T H I R T E E N // Cleaning products and rags, but again, be sure to select holders made out of an easy-to-clean material.
F O U R T E E N // Organize and corral paperwork to file and bills to pay. Most file folders are designs to fit nicely, especially these vertical types.
F I F T E E N // Turn one into a valet/charging station to hold daily items such as keys, change, wallet and phone.
Here is how to make that last one happen....
First, for cord management, I drilled a hole into the back of the box with a wide drill bit. You could also use a utility knife to cut through some types of material. I decided to add a decorative grommet to clean up the edges and prevent any future tearing.
To add "shelves" I went to the lumber department at Home Depot and picked up some cheapy hobby boards. (I believe I used these for the rails and these for the shelves.)
These lightweight boards are easy to cut to length with no need for power tools. For the rails, I simply used a ruler to draw a level pencil line inside the walls of the magazine file and affixed them with hot glue.
I debated about staining the project boards, but took the easy route and just wrapped them in adhesive shelf liner (this one for reference, which has unfortunately more than doubled in price since I purchased it earlier this year).
I love how this little hack really changes the overall functionality of the magazine file and becomes the perfect place for dropping daily necessities.
___________
So tell me, do you already use magazine files for any of these functions, or do you have any additional ways to put them to work? Let's keep growing the list in the comments below!

U P D A T E ! I can't believe I left this one out, as it was the one that ignited the idea for the entire post.
How about putting a few magazine files inside of a bigger basket to act as dividers? It worked so well for our gift wrap items such as boxes, tissue, gift bags, ribbon, tags and bows! Perfect for this giving season!
Subscribe to:
Posts (Atom)


