My very sweet sewing friend just created a very sweet sewing station. Palak, from
Make It Handmade, is here today to share how you don't need a large space for it to be fab and functional. I am over the moon for her smart storage solutions, and how her new happy corner turned out.
Hello, IHeart Readers! Since I've been sewing more often, my husband and I thought it would be nice for me to have one corner of our media room for my sewing machine. I thought I would share how it was organized {on a budget!}. I also have a simple sewing project for you guys near the end of the post.
The biggest change we made was changing out my sewing table for a smaller wooden one {from IKEA!}, and converting it into a
DIY sewing table. The table has a hole in it for my machine, which makes sewing so much easier and more comfortable. This was our first, big woodworking project and I'm absolutely thrilled with how it turned out. If you are interested in making your own, I wrote up a post with the
details at Make It Handmade.
Then it was just a matter of making the smaller table work with with all my sewing notions and tools.I have a few purposed containers on the table top-- like this old pesto jar for safety pins.
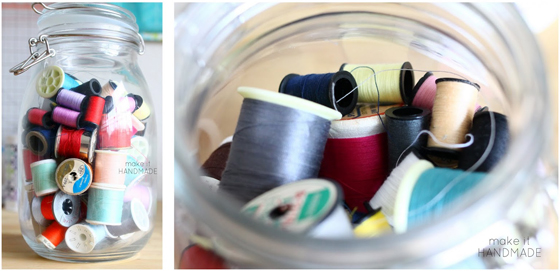
And a candy jar for those tiny spools of thread that just have a bit of thread left.
Since I can't access the little storage box on my machine now, I've been using this tackle and bait box to store my sewing machine feet, bobbins and needles. I papered the back of it with matching paper and double stick tape to pretty it up a bit.
The rest of my storage moved to the wall above my desk. I purchased the
inexpensive Bygel rail system from IKEA, and used it to keep my thread, rulers and cutting mats up and out of the way. I love how everything is in easy reach, and I still have enough room to sew, cut and create on my table.
However-- it was still looking a little too industrial for my taste. I came up with this fun little
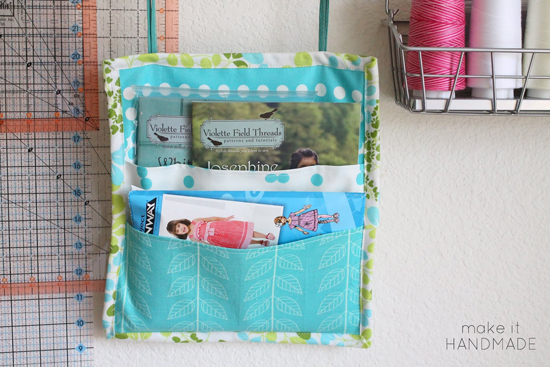
sewn caddy to hold some of my favorite patterns. The caddy is made of a few rectangles of fabric, and is trimmed out in bias tape. It's also a perfect first bias tape project since it's small and the back of your work won't be seen.
Here's a close up of the trim. In addition to the
Anything Caddy tutorial, I've also put together the
Ultimate Guide To Sewing Bias Tape for those of you wanting to branch out from the basics!
I loved the way the print looked so much, that I also added a little
matching embroidered pincushion and made a sewing tutorial for that too!
Thank you so much for letting me share a bit of my sewing space with you all!
 "I'm Palak-- a slightly sleep deprived mom who has loved sewing, knitting and crochet for her whole life. When I’m not chasing after my two rambunctious kids, or sitting behind my sewing machine, I write about my DIY exploits at my blog, Make It Handmade. I also own Sewistry, a site dedicated to stretching our sewing dollars with money saving projects, product review and buying guides. Although organizing doesn’t come naturally to me, I’ve been inspired by Jen and her blog to find the joy in making my home beautiful and functional. I’m transforming my home one room at a time and using my sewing machine every chance I get! I’m simply elated to be able share sewing projects for your home as part of the IHeart team! "
 "I'm Palak-- a slightly sleep deprived mom who has loved sewing, knitting and crochet for her whole life. When I’m not chasing after my two rambunctious kids, or sitting behind my sewing machine, I write about my DIY exploits at my blog, Make It Handmade. I also own Sewistry, a site dedicated to stretching our sewing dollars with money saving projects, product review and buying guides. Although organizing doesn’t come naturally to me, I’ve been inspired by Jen and her blog to find the joy in making my home beautiful and functional. I’m transforming my home one room at a time and using my sewing machine every chance I get! I’m simply elated to be able share sewing projects for your home as part of the IHeart team! "


Thanks for some great ideas to try in my home!!
ReplyDeletexoxo
Rachel
That is a neat little sewing corner! I love hwo you kacked that table yourself. Thanks for sharing! :)
ReplyDeleteThis is a great idea! I've been seeing quite a few organizing stations lately, if only I had the room for all of them!! Thanks for sharing!
ReplyDeleteCute!! Great ideas for my sewing area (that's slowly but surely coming along!). Love it!
ReplyDeleteSuch a lovely sewing area
ReplyDeleteOoh, I love this! And I never knew I could make my own bias tape- hurray! I use bias tape to trim out lots of my projects, and now I have a cuter (and cheaper) way to do it! thank you!
ReplyDeleteWhat a cute area and I love the personalized touches!
ReplyDeleteAwww, Thank you so much! I'm so glad that you all liked it! (I'm kind of in love with it too!)
ReplyDeleteGreat space! I use the same tackle boxes for my son's hotwheels and to divide our screws and nails. Now I will try one for my sewing stuff! Hooray!
ReplyDeleteI just love that table and how you made it a sewing table. I must think how I could make one for me..glad you have instructions :)
ReplyDeleteI saw this amazing sewing table on Make It Handmade a few days ago and i have already asked my hubby to build one for me for Christmas! I am planning a big sewing room/office redo and this table is going to work perfectly! Thanks to you both for sharing your great ideas and for keeping me inspired to organize, declutter, and create!
ReplyDeleteThank you for reading my posts! I think this will make a great Christmas gift-- I still thank my husband every time I get a chance! :)
DeleteNice organizing, Palak!
ReplyDeleteWow..just great!
ReplyDeleteSo tidy! Where and how to do you store all of your fabric?
ReplyDeleteThank you! My fabric storage needs to be overhauled. Right now I keep fabric in bins and baskets arranged roughly by material (woven cotton, knits, linens, and clothing to be refashioned). They are hiding out in the closet in our study.
DeleteLove this sewing station. I want one!
ReplyDeleteWhat a lovely space! I think I need to give my own sewing space some love. I'm also curious how you store your fabric? Can't wait to browse around Make it Homemade for more inspiration too :)
ReplyDeleteThis reminds me of a project we did on our blog! We love watching what you contribute to Jen's blog, we constantly check in to see you and everyone elses posts. Please check out our most recent organizational project.
ReplyDeletehttp://fivetimesfun.blogspot.com/2013/11/fixing-office-space.html
xo
ps